Magic SafeMail – Deployment in Microsoft 365 Environment
Deploying the Magic SafeMail service in a Microsoft 365 environment is easy with the help of this guide. The following settings can be configured by a person with a global admin account in your Microsoft 365 environment.
Magic SafeMail – Deployment in Microsoft 365 Environment
1. Sign in to the Microsoft Exchange admin center at admin.exchange.microsoft.com
2. From the menu, select ’Mail flow’ → ’Connectors’ and click the ’Add a connector’ button

3. Select ‘Partner organization’ and click the Next button

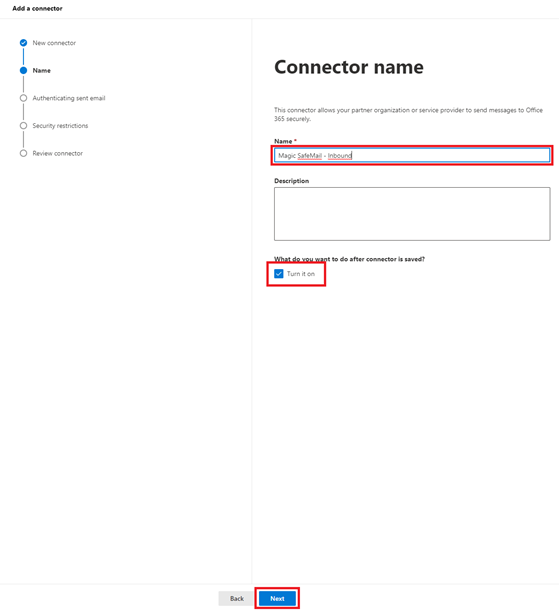
4. Enter a descriptive name for the connector (for example, ‘Magic SafeMail – Inbound’) and make sure the ‘Turn it on’ option is selected. Finally, click the Next button
5. In the section ‘By verifying that the sender domain matches one of the following domains’, enter *.s and click the + button. Then scroll down and click the Next button.

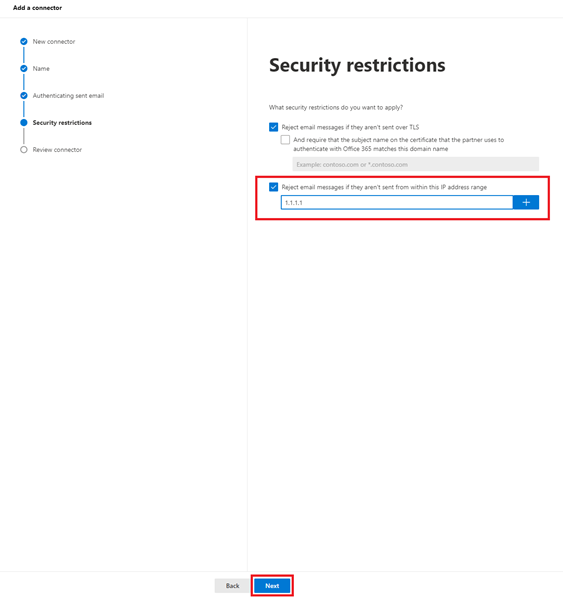
6. Select ‘Reject email messages if they aren’t sent from within this IP address range’, enter the IP address provided by Micro Magic, and click the + button. Finally, click the Next button.
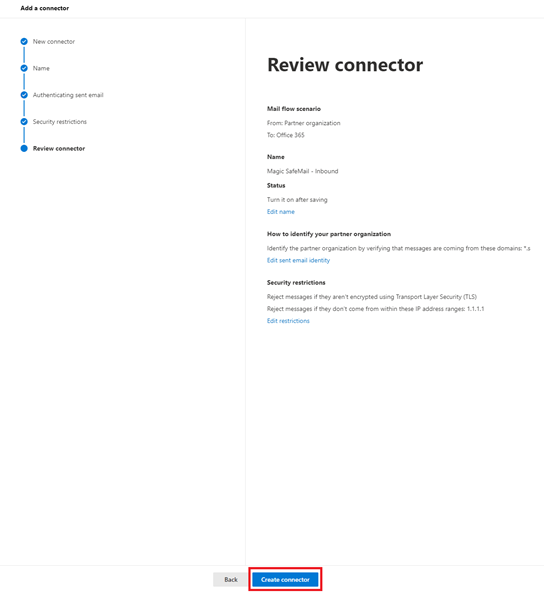
7. Click the ‘Create connector’ button
8. Click the ‘Add another connector’ button

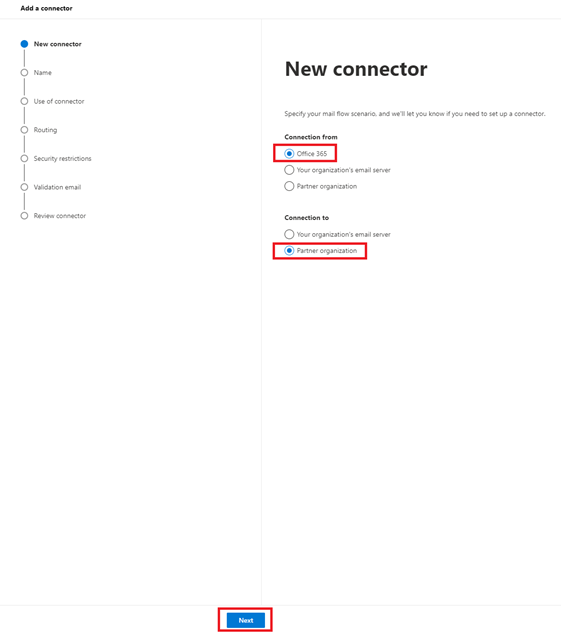
9. For the ‘Connection from’ field, select Office 365, and for the ‘Connection to’ field, select Partner organization. Finally, click the Next button.
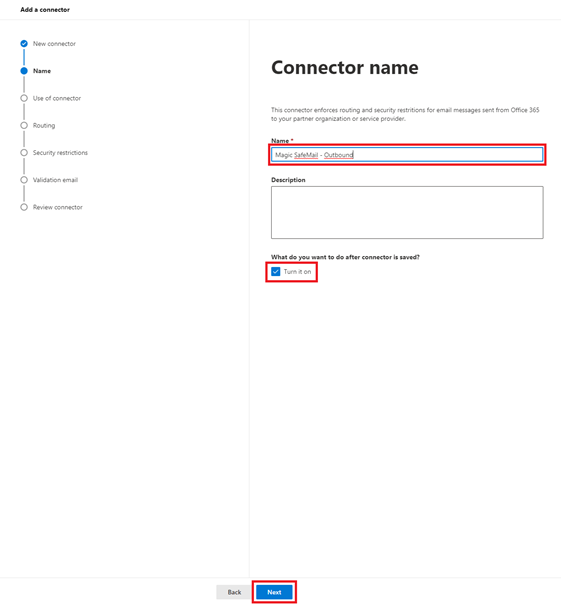
10. Enter a descriptive name for the connector (for example, ‘Magic SafeMail – Outbound’) and make sure the ‘Turn it on’ option is selected. Finally, click the Next button.
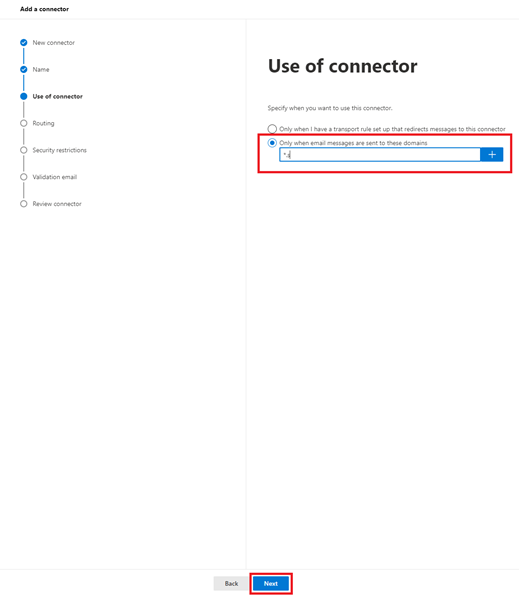
11. In the section ‘Only when email messages are sent to these domains’, enter *.s and click the + button. Then scroll down and click the Next button.
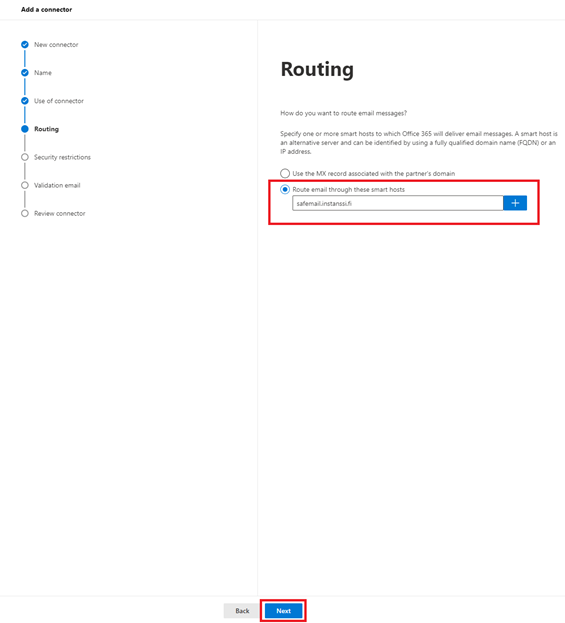
12. In the section ‘Route email through these smart hosts’, enter the instance address provided by Micro Magic and click the + button. Finally, click the Next button.
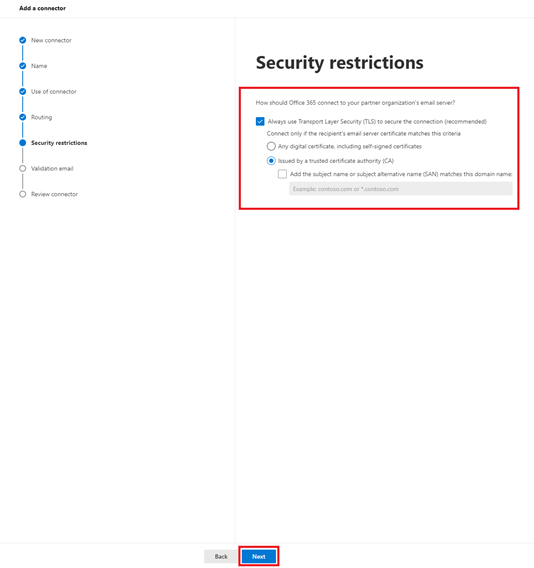
13. Make sure the default settings are selected as shown in the reference image, then click the Next button.
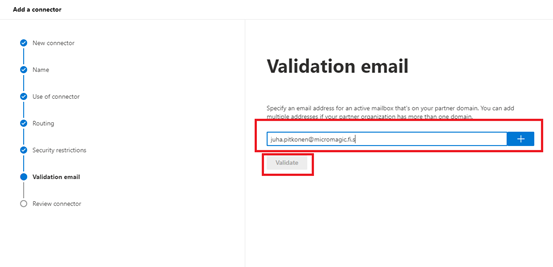
14. In the address field, enter your own email address followed by .s, then click the + button. After that, click the Validate button.
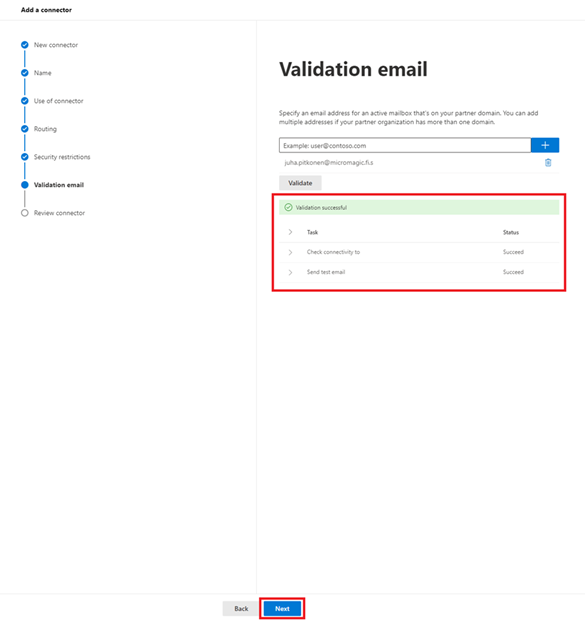
15. Once the test message has successfully passed as shown in the reference image, click the Next button.
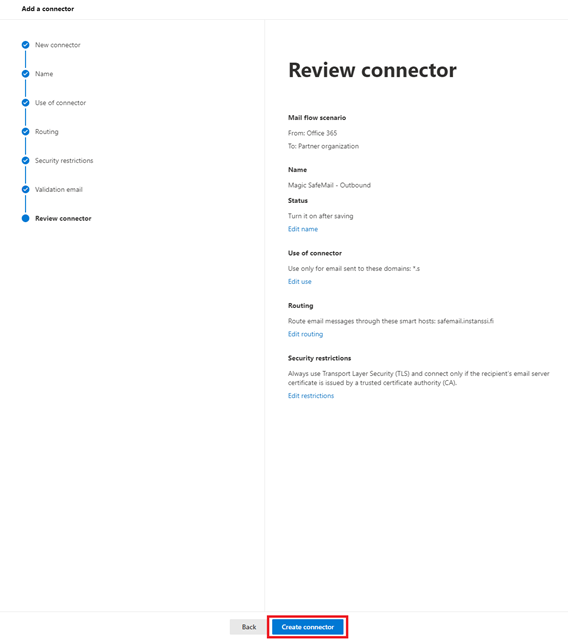
16. Finish by clicking the ‘Create connector’ button.
Great! You have now successfully connected Microsoft 365 email service with the Magic SafeMail encryption service.
NOTE!
Microsoft 365 email accounts may have various spam filtering settings enabled. Please ensure these settings do not conflict with the Magic SafeMail service. You can find detailed instructions for adjusting the spam filter at the following link. (in Finnish)
